
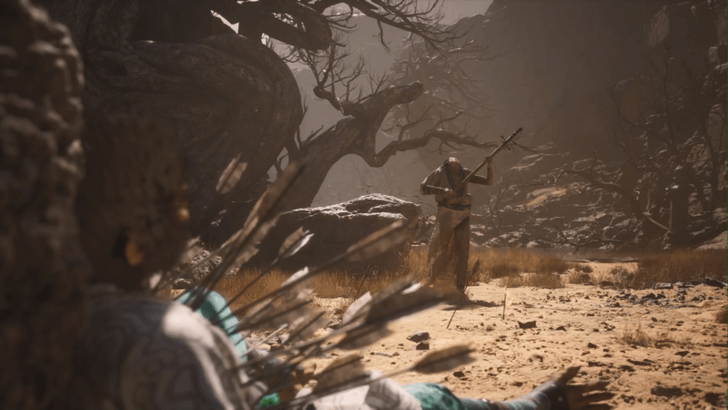
Black Myth Wukong Chapter 2:Yellow Sand, Desolate Dusk
Black Myth: Wukong Walkthrough Table Lists
| 1 | Black Cloud Red Fire | 4 | Purple Cloud Mountain |
| 2 | 5 | Golden Child, Crimson Blood | |
| 3 | White Snow, Ice Cold Guide | 6 | Unfinished |
Sandgate Village Walkthrough
Village Entrance Guide
| Objectives | |
|---|---|
| 1 | From the starting area, go through the water and towards the left, opposite of the big dead tree. |
| 2 | Follow the path upwards until you can see the Sandgate Village. |
| 3 | Continue following the path until you can drop to defeat an enemy and unlock the Shrine. |
| * | Optionally, you can head back towards the starting area to explore and pick up any items you find. |
| 4 | Head towards the main gate and drop off the bridge into the ditch. From there, head into the cave. |
| * | Head forwards and down into the pit to defeat Lang-Li-Guhh-Baw for Xu Dog. |
| 5 | Go up the stairs and to the left towards the back area of the village. Defeat enemies and pick up items on the way to the gate on the right. Be careful of the two-headed Rat Captains as they're tough even if they're regular enemies. |
| 6 | Go through the gate and defeat the King of Flowing Sands and his son, the Second Prince of Flowing Sands. ▶ Click here for the Second Prince of Flowing Sands Boss Guide |
| 7 | After the fight, head left of the big locked gate to activate the Valley of Despair Shrine. |
Bottom of the Well
| Objectives | |
|---|---|
| * | Only accessible after using the Old-Rattle Drum in three locations around Yellow Wind Ridge. |
| 1 | Defeat the Mad Tiger at the bottom of the well. You can die the first time to reset before the boss and activate the shrine. ▶ Click here for the Mad Tiger Boss Guide |
| 2 | Head to the left side of the arena and pick up the Plaguebane Gourd from the treasure chest. |
Valley of Despair Guide
| Objectives | |
|---|---|
| 1 | Head into the cave and go left towards the open-lit area. This is the boss arena for the First Prince of Flowing Sands, and its unlock conditions differ depending if you beat the King or Prince first in the previous boss fight. ▶ Click here for the First Prince of Flowing Sands Boss Guide |
| * | Defeat the First Prince of Flowing Sands to get a drop necessary to unlock the Secret Area for this region. |
| ** | Break the red wall with one of the First Prince's attacks or with one of your Transformations, like the Wandering Wight. This will unlock an area that has the Loong Scales used to unlock the optional Loong bosses. |
| 3 | Follow the lit braziers towards a wall that you'll need to squeeze through. |
| 4 | Defeat the Swift Bat and absorb its Spirit. |
| * | Roll through the wooden barricades to get to an area with more Bats and a small treasure chest. |
| 5 | Head out of the cave and back into the sunlight. Follow the path until you reach the Crouching Tiger Temple's Entrance Shrine. |
Crouching Tiger Temple Walkthrough
Temple Entrance Guide
| Objectives | |
|---|---|
| * | Explore the area for items, a treasure chest, and a Meditation Spot. |
| 1 | Head up the stairs to fight the Tiger Vanguard. |
| 2 | After the fight, head past the statue and down the stairs. |
| 3 | Follow the path, defeating any enemies and picking up items along the way. |
| 4 | At the top of the path, unlock the Windrest Bridge Shrine. Jump to Windrest Bridge ▶ |
Cellar Guide
| Objectives | |
|---|---|
| * | Unlocked after beating both the Tiger and Stone Vanguards, and activating the statue on top of the pool's stairs. You can also reach this shrine by going down from the Windseal Gate Shrine and heading left before the tornado. Although, you'll lose out on the rewards you get from going through the Crouching Tiger Temple Entrance. |
| 1 | Head down through the mouth and follow the path until you reach the cave area past a doorway. |
| 2 | Defeat the Civet Sergeants and pick up the Spirit and treasure chest rewards after the fight. |
| 3 | Jump and slide down the sand until you reach the Cellar Shrine. Rest here before moving forward. |
| * | If you've beaten Lang-Li-Guhh-Baw and helped Xu Dog, he will appear to the right of the shrine. This unlocks the ability to make Celestial Medicines to buff your base stats. |
| 5 | Head down and left to face the final boss of this chapter, the Yellow Wind Sage. ▶ Click here for the Yellow Wind Sage Boss Guide |
Fright Cliff Walkthrough
Squall Hideout Guide
| Objectives | |
|---|---|
| 1 | From the King and Prince of Flowing Sands boss arena, head right across the bridge. |
| 2 | Follow the path until you reach the Squall Hideout shrine. |
| * | Explore the area for 6 Buddha Eyes to unlock the Shigandang boss fight, as well as any items and treasures in the area. |
| 4 | From the shrine, take the left path towards the cave full of Stone-type enemies. |
| 5 | Continue through the cave until you reach a branching point with a Poistone and Blazebones. When you get there, head left. |
| * | Follow the braziers on the left to go up to the Mother of Stones boss arena. |
| 6 | After turning left, head out to the right to unlock the Rockrest Flat Shrine. |
Rockrest Flat Guide
| Objectives | |
|---|---|
| 1 | Hug the wall on the left until you reach the boss arena for the Stone Vanguard. When you're ready, head towards the back of the arena to start the fight. |
| * | The boulder immediately on the left when entering the arena is Shigandang, so return here when you have the 6 Buddha Eyes to activate their boss battle. |
| 2 | After beating the Stone Vanguard, head through the collapsed gateway to activate the Rock Crash Platform shrine. |
| * | Going straight ahead from the shrine will lead you to the Yellow-Robed Squire for the Boar Questline. ▶ Click here for the Yellow-Robed Squire Boss Guide |
| ** | Going to the right from the shrine will lead you to the Spearbone Spirit and the sand waterfall that hides the Hidden Loong Cavern. |
Hidden Loong Cavern Guide
| Objectives | |
|---|---|
| * | Unlocked after obtaining the Loong Scales and removing the sand waterfall in Rockrest Flat. |
| 1 | Defeat the Black Loong and open the treasure chest afterwards. |
Rock Crash Platform Guide
| Objectives | |
|---|---|
| 1 | Follow the path defeating any enemies and picking up items along the way. |
| * | Continue heading straight towards the ledge to unlock a Meditation Spot. |
| 2 | Head right following the lit braziers and continue to follow the path forward. |
| 3 | Jump down to the left and slide down the sandy slope. |
| 4 | Head on forwards towards the bridge and Rest at the Windseal Gate Shrine. |
Yellow Wind Formations Walkthrough
Windrest Bridge Guide
| Objectives | |
|---|---|
| 1 | Head down towards the bridge and clear the enemies blocking your path. |
| 2 | Go left and up the stairs, then immediately go right to where a Blazebone is blocking the way. |
| 3 | Keep going forward and down to kill the Spearbone on the way to the gate. |
| 4 | Defeat multiple Rat Imperial Guards to unlock the gate. After killing the Rat with the blue flame, you will also get a Spirit. |
| 5 | Open the gate and go right to pick up a Luojia Fragrant Vine for your Gourd upgrades. |
| 6 | Follow the path upwards until you reach the Windrest Hamlet shrine. |
Windrest Hamlet Guide
| Objectives | |
|---|---|
| 1 | You'll need to head towards the bridge and defeat any enemies in your way. |
| 2 | Pick up some Will and open the treasure chest on the way to the windy bridge. |
| 3 | Prepare yourself to take on the Tiger's Acolyte. Be careful not to fall off since there are no invisible barriers. |
| 4 | Absorb the Spirit of the Tiger's Acolyte and head into the cave on the other side of the bridge. |
| 5 | Defeat enemies in your way and open the small chest containing the Glazed Reliquary Curio. |
| 6 | Continue through the cave until you're back outside and can drop down into the Stone Vanguard's arena. |
Windseal Gate Guide
| Objectives | |
|---|---|
| * | From the shrine, head to the left side of the bridge and up the path. This will lead you to the Gore-Eye Daoist boss, who rewards you with his Spirit and a Luojia Fragrant Vine afterward. As a note, there's no need to continue further up the path right away since it leads you back to the Sandgate Village and Valley of Despair. |
| 1 | Open the gate after beating the Tiger and Stone Vanguards, then head down towards the sand tornado. |
| 2 | Prepare yourself before heading into the tornado as this is the final boss of the area. ▶ Click here for the Yellow Wind Sage Boss Guide |
Kingdom of Sahali Walkthrough
Sandgate Pass
| Objectives | |
|---|---|
| 1 | After the cutscene, you'll be teleported to the Kingdom of Sahali. |
| 2 | Head down the path until you reach the Tiger Vanguard, who you must defeat before proceeding forward. |
Sandgate Bound
| Objectives | |
|---|---|
| 1 | Head towards the large area and activate the Sandgate Bound shrine. |
| * | Explore the area for two treasure chests and a Meditation Spot. |
| 2 | Head up the cliff and talk to the Yellow Wind Sage beside the drum. |
| 3 | When you're ready, head down to the arena to fight Fuban. |
| 4 | Once they've been defeated, you'll be teleported back to where you fought the Yellow-Robed Squire. |