Black Myth: Wukong Walkthrough Table Lists
|
Objectives |
| 1 |
From the starting area, follow the path until you're out of the cave. |
| 2 |
Activate the Frost-Clad Path Shrine. |
| 3 |
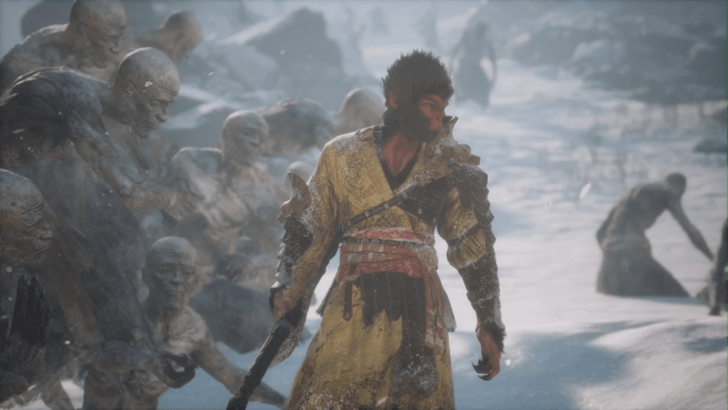
Continue following the path up the mountain killing any enemies on the way. |
| 4 |
Prepare yourself to fight the Macaque Chief before heading into the open area. |
| * |
Rest back at the Shrine since the next Shrine you unlock is at the end of Snowhill Path. |
| 5 |
Continue up the mountain until you reach the temple area. |
| 6 |
Immediately head left and up the stairs. Also, dodge as soon as you get to the top of the stairs since there will be an enemy waiting to ambush you. |
| * |
Explore the area for any treasure chests and items you can find. |
| 7 |
Continue down and right towards the tree in the middle of an island. Don't go to the tree until you're ready to proceed to the next area. |
|
Objectives |
| 1 |
After the cutscene, activate the Mirrormere Shrine. |
| * |
Explore the area for a Meditation Spot, treasure chests, and any other items you can find. |
| 2 |
Step on to the lake and fight Kang-Jin Loong. |
Pagoda Realm Walkthrough
This area has a gimmick with Lantern Waderns where they will cut your Max HP in half. Whenever your screen turns desaturated, either defeat a Lunar Warden or wait out the effect so you can heal yourself back to full.
Waiting out the effect is the preferred option, but defeating Lunar Wardens grant you a lot of EXP and Will for this area of the game.
|
Objectives |
| 1 |
After the cutscene ends, you will be put in a new area. Follow the path outside your cell until you reach the Lower Pagoda Shrine. |
| * |
Ignore any cells with a purple seal for now since you'll need to defeat a boss to unlock them. |
| 2 |
Continue following the path until you see a staircase on the inside that will lead you to the second floor. |
| 3 |
Head up and turn right once you're on the second floor. Follow the path across the wooden beam and head inside. |
| 4 |
Continue following the path until you come across a ramp on the right that will lead you up to the third floor. |
| 5 |
At the top, continue following the path forward until you come across the Upper Pagoda Shrine. Make sure to activate it, otherwise, you'll need to go all the way back up here if you die. |
| * |
Turn around and drop down to the purple area to fight Captain-Lotus Vision. Defeating this boss will unlock all the purple sealed cells in the area. |
| ** |
Return to the Lower Pagoda to unlock the cells that were previously sealed. The cell that's next to where you initially spawned will have an NPC that will start The Third Prince Questline. |
|
Objectives |
| 1 |
From this Shrine, continue on forward until you need to drop down to the ledge on your right. |
| 2 |
Continue on forward across the wooden beams until you reach an entrance with a lantern. |
| 3 |
Go through the entrance and up the ramp leading to the fourth floor. |
| 4 |
Continue following the path until you come across a ramp on the right that will lead you up to the third floor. |
| 5 |
At the top, head out left and follow the path until you reach the broken structure that leads you to the top of the prison. |
| 6 |
Once you're at the top, follow the path on the left until you reach the Mani Wheel Shrine. |
|
Objectives |
| 1 |
Rest and prepare yourself to fight Captain Wise-Voice. Defeating this boss will prevent any Lantern Wardens from spawning, so make sure to take on this boss only after you're done farming them. |
| 2 |
After the boss has been defeated, head out the other side and activate the Outside the Wheel Shrine inside the cave. |
|
Objectives |
| 1 |
Head forward through the cave picking up any items along the way. Make sure to get the Luojia Fragrant Vine for your Gourd upgrades. |
| 2 |
Continue on forward outside the cave and pick up any items and treasure chests you find. |
| 3 |
The path forward is extremely linear, so keep following the path until you reach the Snow-Veiled Trail Shrine. |
|
Objectives |
| 1 |
Head up the stairs to the left and follow the path filled with the Frozen Corpses. |
| * |
Following the path to the right will lead you to The Great Pagoda, but you can't do anything there yet. It's still a good idea to visit the area though just to unlock the Shrine. |
| 2 |
Once you reach the small creek, head left up the stairs until you reach the Warding Temple Shrine. |
As of Chapter 3, there's nothing you can do here. From what can be seen so far, each wall needs to be filled with a mural, and these murals are unlocked after beating a Chapter.
Based on this information, it can be assumed what you would need to beat each chapter before unlocking The Great Pagoda's secret. Most likely, this will unlock the Chapter 3 secret area since it isn't unlocked otherwise
|
Objectives |
| 1 |
Continue up the stairs and into the temple, where you will need to fight the Macaque Chief for the second time. |
| * |
Head back to the Shrine and rest since there will be another boss fight after leaving this area. |
| 2 |
After beating the boss and unlocking the Ring of Fire spell, head to the left and out through the back exit. |
| 3 |
Head up the slope and then slide down into the next area. |
This is the area you slide down towards before boarding the Turtle Island and taking on Kang-Jin Star. As of now, it looks like there's nothing to do here besides unlocking the Shrine.
|
Objectives |
| * |
You can die to Kang-Jin Star to respawn and activate the Turtle Island Shrine. |
| 1 |
Once you're ready, head up towards the cymbals and defeat Kang-Jin Star. |
| * |
Rest at the Shrine and head to the right to defeat Cyan Loong. |
| 2 |
Head forward from the Shrine all the way to the Turtle General's head. |
| 2 |
When you're ready to leave, talk to the Pig. |
|
Objectives |
| * |
Head to the left and defeat Chen Loong to start the Zodiac Village Questline. |
| 1 |
From the Shrine, follow the frozen corpses to the right and into a cave. |
| 2 |
Follow the path upwards until you reach a rope bridge. |
| * |
Before the bridge, go through the opening in the left to grab a trasure chest. |
| 3 |
Head across the bridge and unlock the Precept Corridor Shrine. |
|
Objectives |
| 1 |
Follow the path forward, picking up the Meditation Spot and treasure chest on the way. |
| 2 |
Once you reach the cave, head left and follow the stairs upwards until you fight the Red-Haired Yaksha and absorb its Spirit. |
| 3 |
Head out and into the pagoda to start a cutscene. |
| 4 |
After the cutscene, head left and interact with the first Buddha statue. |
| 5 |
Continue going left and down the stairs until you reach the second Buddha statue on the right. |
| 6 |
Turn around and follow path past the stairs until you reach the third Buddha statue. |
| 7 |
Go through the gate and continue on until you see the final Buddha statue with a Red-Haired Yaksha on the right. |
| 8 |
Turn around and drop down back to the pagoda for another cutscene. |
| 9 |
After the curscene, head right and follow the stairs all the way up towards the big statues. |
| 10 |
Keep going forward past the first two big statues until you reach the third one. |
| 11 |
Head up the stairs and go in through the small gap at the top. |
| 12 |
Follow the path upwards until you reach the Mindfulness Cliff Shrine. |
|
Objectives |
| 1 |
Once you're ready, follow the path into the open area where you'll have to fight Non-White for the first time. |
| * |
Head back to the Shrine and rest up before proceeding forward. |
| ** |
You can drop down to the collapsed pillar by following the path downwards past the tree in the boss arena. Following this path will lead you to a Fiery Gourd and the Skandha of Thought. |
| 2 |
Continue upwards past the cave entrance and head forwards until you fight Non-White for the final time. |
| 3 |
After the fight, activate the Meditation Spot and proceed down the snowy slope and to the Forest of Felicity Shrine. |
|
Objectives |
| 1 |
Follow the very long path forwards until you reach the Longevity Road Shrine. Just follow the obvious path laid out before you and you'll get there eventually. |
| * |
You can choose to explore the Valley of Ecstasy since this is a large section with optional areas, quests, and bosses. Make sure to activate any Shrine you come across, so that you have locations to teleport to. |
This is an optional area that's part of the Treasure Hunter Sidequest. We will update this section when we have more info regarding this quest, so stay tuned!
|
Objectives |
| 1 |
To get to this area, head down from the path to the right of the Forest of Felicity Shrine. |
| 2 |
Once you're down, turn around and take any of the bridges to the right side of the area so you can access the Brook of Bloss Shrine. |
This is an optional area that's not necessary to complete the main story. However, there are items and collectibles around this area, so it is still worth visiting.
|
Objectives |
| 1 |
To get to this area, you'll want to head head through the archway in front of the Forest of Felicity Shrine, and then head left. |
| 2 |
From there turn right and follow the path forwards until you reach the Towers of Karma Shrine. |
This is another optional area that's not necessary to complete the main story. Again, there are items and collectibles around this area that makes it worth visiting.
|
Objectives |
| 1 |
From the Shrine, head forwards to the open area and go right towards the New Thunderclap Temple. |
| 2 |
Follow the path up to the entrance of the temple and defeat Captain Kalpa-Wave. |
| 3 |
Once the boss is defeated, head through the entrance and activate the Temple Entrance Shrine. |
|
Objectives |
| 1 |
From the Shrine, just head on straight throught the building in front of you and up the dual staircase.. |
| 2 |
Once you're up the stairs, continue straight through the nearby building. |
| 3 |
Continue going straight on forward until you reach the large open area with a big set of stairs and two massive Dark-faced Overlords. |
| 4 |
Climb up the stairs and activate the Mahavira Hall shrine. |
|
Objectives |
| 1 |
Prepare yourself since this is the final Shrine before you head to the final boss of this chapter. |
| 2 |
Once you're ready, head through the doors to face the final boss of this chapter, Yellowbrow. |
| * |
After beating his first phase, you will be sucked into his pouch where you'll fight a power up version of the Macaque Chief. Thankfully, you'll be fully recovered so the only thing you'll need to worry about are your spell and ability cooldowns. |
The Floating Scuplture Upper and Lower Level travel locations aren't Shrines but are teleport points that act as a failsafe in case you die during the Yellowbrow boss gauntlet.
This allows you to teleport back to those checkpoints in case you leave using the Incense Trail Talisman to change your equipment and spells at a Shrine.