

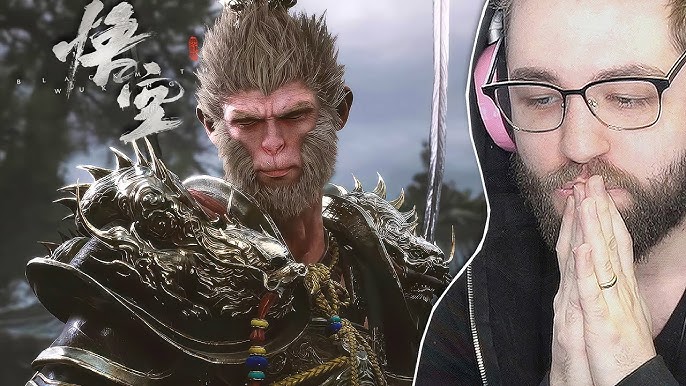
The Latest Posts of Black Myth: Wukong
Black Myth Wukong Chapter 5:Golden Child, Crimson Blood Walkthrough
Black Myth: Wukong Walkthrough Table Lists
| 1 | Black Cloud Red Fire | 4 | Purple Cloud Mountain |
| 2 | 5 | Golden Child, Crimson Blood | |
| 3 | White Snow, Ice Cold Guide | 6 | Unfinished |
Woods of Ember Walkthrough
Ashen Pass I Guide
| Objectives | |
|---|---|
| 1 | As soon as you spawn in the chapter, you'll have to fight off a wave of enemies alongside Zhu Bajie. Once they've been defeated, a cutscene will play and you can move on through the large doors. |
| 2 | Head forward and defeat the enemies in front of the Ashen Pass I Shrine to unlock it. |
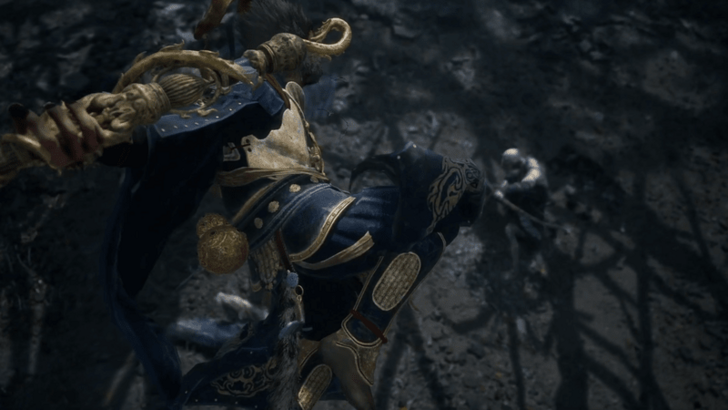
| 3 | After resting at the Shrine, follow the path until you reach an area with enemies fighting each other. Clear out as many enemies as you can to make the boss fight against the Pale-Axe Stalwart more manageable. At around 25% HP, the boss will get on his knee, allowing you to talk to him to initiate the Five Element Cart Sidequest. This is required to unlock the secret area for Chapter 5! |
| * | As long as you're not being assaulted with a barrage of fireballs, you can explore the area to unlock the treasure chests. |
| 4 | Afterwards, head up the stairs towards the bridge to deal with the Brown-Iron Cart boss that's been flinging fireballs at you. |
| 5 | Once they've been dealt with, head to the bridge to unlock the Camp of Seasons Shrine. You can also head back down to unlock a Treasure Chest once the battle's over. |
Camp of Seasons
| Objectives | |
|---|---|
| 1 | Head across the bridge and follow the path through some caves. |
| 2 | Once you've crossed a different smaller bridge, defeat the enemies in the area to unlock a treasure chest and the Meditation Spot at the top of the stairs to the right. |
| * | Follow the path to the left of the stairs to reach a treasure chest guarded by a few enemies. |
| 3 | Continue forward until you reach the structure with a small chest containing the Mount Lingtai Seedlings Soak. |
| 4 | Cross the bridge and keep following the path to the Height of Ember Shrine. |
Height of Ember
| Objectives | |
|---|---|
| 1 | When you're ready, head to the open area to take on the Father of Stones boss fight. |
| * | After the fight, ignore the doorway and go explore the area ahead. There will be a treasure chest when you go straight, and if you explore the area below, there will be a few items to pickup, most notably a Luojia Fragrant Vine. |
| 2 | When you're ready, head through the doorway along the wall that the boss jumped over. |
| 3 | Follow the path forward, ignoring the Gray-Bronze Cart for now, until you reach a cave. |
| * | If you wish to ignore the cave and the items inside, you can drop down to the left before entering the cave. However, you will take fall damage and will need to use up one of your Gourd heals. |
| 4 | Explore the cave for a bunch of Will, a few treasure chests, and the Sprit of a Charface. When you want to proceed, follow the lit braziers to get out of the cave. |
| 5 | Continue following the path outside, opening the chest along the way, and head towards the Gray-Bronze Cart boss fight. |
| * | Optionally, after beating the boss, teleport back to the shrine to rest back up as there's another boss up ahead. |
| 6 | When you're ready, head through the narrow corridor for a boss fight against Quick as Fire, Fast as Wind. |
| 7 | After the two heads have been defeated, head around to the back of the boss arena to unlock the Ashen Pass II Shrine. |
Ashen Pass II
| Objectives | |
|---|---|
| 1 | Follow the Fox until you reach a cliff edge. Once you're there, drop down for a cutscene that will introduce the Furnace Valley. |
| 2 | Head forward across the water until you reach the Valley Entrance Shrine. |
Furnace Valley Walkthrough
Valley Entrance Guide
| Objectives | |
|---|---|
| * | Before proceeding, equip the Fireproof Mantle so that you're immune to the lava-covered terrain. |
| 1 | Continue on forwards until you reach two large pillars where you'll then head down to the magma area. |
| * | The non-lava covered path to the right leads you to a treasure chest and a dead cart. The cart is the finale of the Horse Guai Quest and part of the Five Elemental Cart Quest. |
| ** | The lava-covered path to the right will lead you to a treasure chest containing a Kun Steel, and a Spirit for the Turtle Treasure. |
| *** | The lava-covered path to the left will lead you to the Flint Chief optional boss. Make sure you have the Fireproof Mantle equipped since you'll be on top of lava the entire fight. |
| 2 | Once you're at the bottom, head forward and up following the path upwards. |
| * | Around halfway up the path, there will be a treasure chest guarded by an Earth Rakshasa, that also drops its spirit. Be careful of its flame breath as it can stun lock and kill you in one hit. |
| 3 | Continue up the path until you reach the Cloudy Mist, Misty Cloud boss arena. After the fight, go up the stairs and through the doorway to activate the Rakshasa Palace Shrine. |
Rakshasa Palace Guide
| Objectives | |
|---|---|
| * | Look around the area of the shrine for treasure chests before proceeding forward. |
| 1 | Follow the path forward along the bridges until you reach the area with large enemies with shields. |
| * | Step down onto the lava to reach an area on the left with the Old Sage and a glowing barrel containing an Awaken Wine Worm. If you talk to the Sage with a fully upgraded Medicine Buddha Gourd, you can interact with the fire to upgrade it to a Supreme Gourd. |
| 2 | Head into the pagoda on the right and follow the path forward to reach The Emerald Hall Shrine. |
The Emerald Hall Guide
| Objectives | |
|---|---|
| * | Before proceeding forward, make sure that you've completed the Horse Guai Quest and received the Transformation Spell. If you don't, beating the next boss will stop Ma Tianba from spawning and you can't complete the quest. |
| 1 | Once you're ready, head up the stairs to initiate the back-to-back boss fights with the Keeper of Flaming Mountains and Yin-Yang Fish. If you die during either phase of this fight, you'll have to start at the beginning and fight the Keeper again. |
| * | After the battle, head up to the altar to get the Loong Balm Drink from the small chest. Next, head out towards the balcony and go right to activate a Meditation Spot. Finally, turn back towards the altar and go left to find a chest with the Slumbering Beetle Husk Soak. |
| 2 | When you're ready to move forward, go back to the altar and head up left, following the path and unlocking the chest along the way. |
| 3 | Continue following the path headed upwards until you have to face the Crimson-Silver Cart. |
| * | If you've exhausted all of the Pale-Axe Stalwart's dialogue in the Camp of Seasons, you can talk to him here after beating the Crimson-Silver Cart. |
| 4 | After the fight, continue on the path until you reach the Ashen Pass III Shrine. |
Field of Fire Walkthrough
Ashen Pass III Guide
| Objectives | |
|---|---|
| * | To the right of the Shrine, interacting with the big red mushroom will start a boss fight with the Nine-Capped Lingzhi Guai. After it's been defeated, you can activate the Meditation Spot in the same area. |
| 1 | When you're ready to move on, head down the path left of the Shrine towards the giant spinning ball of death. Don't get hit by this thing as it kills you in one hit. The only way past this thing is by standing in the little side areas of the path occupied by enemies. Take your time and scout the path ahead so that you can time your movements properly. |
| 2 | You'll be safe from the ball once you've reached the end of the path and start a cutscene. Once it ends, follow the little fox lady down the path until you reach the Fallen Furnace Crate Shrine. |
| * | After getting the Fallen Furnace Shrine, head back down the path where the ball was rolling to find a newly opened area on the left that leads you to the Cooling Slope Shrine. |
Cooling Slope Guide
| Objectives | |
|---|---|
| * | This area is optional, but it leads you to the secret area for this chapter. |
| 1 | From the newly opened path, head downwards until you reach the Flint Vanguard boss. |
| 2 | After the fight, continue down the path until you reach a treasure chest and a large glowing red mark on the ground. Interacting with this mark with 4 Flame Ores in your inventory will start the Mother of Flamlings boss fight. Flame Ores are dropped by the smaller Flamlings in the area. |
| 3 | Once the boss has been defeated, continue following the path until you reach the Cooling Slope Shrine. |
| 4 | When you're ready, and you've talked to the Pale-Axe Stalwart in the Crimson-Silver Cart, walking towards the gate will start a fight with the Rusty-Gold Cart. Beating this boss and talking to the Pale-Axe Stalwart will finish the Five Element Cart Quest and unlock the secret area. |
| * | After you destroy the ice gate, go down and to the left to fight Baw-Lang-Lang before heading to the center to teleport to the secret area. |
Fallen Furnace Crater Guide
| Objectives | |
|---|---|
| 1 | Once you're ready, proceed to the open area to start a cutscene and the Red Boy boss fight. |
| 2 | After the fight, another cutscene will play and you'll have to face the Yaksha King next with Zhu Bajie assisting you. |
| 3 | Once he's been defeated, the final cutscene will start and Chapter 5 will end. |
Bishui Cave Walkthrough
Purge Pit Guide
| Objectives | |
|---|---|
| 1 | Once you spawn in, follow the path downwards and open the treasure chest along the way. Once you reach the large indoor area, turn left to activate the Purge Pit Shrine. |
| * | Follow the path right from the entrance to activate the final Meditation Spot. |
| 2 | Once you're ready, follow the path from the shrine down into the boss arena to fight Top Takes Bottom, Bottom Takes Top. |
| 3 | After the fight, head up the stairs and through the large doorway. |
| * | On the way down from the doorway, watch out for an area with a small chest on the left to grab a Celestial Pill. |
| 4 | Follow the path downwards until you reach the Cave Depths Shrine. |
Cave Depths Guide
| Objectives | |
|---|---|
| 1 | Follow the path downwards and fight all the rhinos to make getting the Bull Governor Spirit more manageable. Don't forget to pick up The Bull King's Iron Horn from the treasure chest as it's used to create one of the best armour sets in the game! |
| 2 | Continue following the path and picking up any items along the way. After sliding down the long ice slope, activate the Corridor of Fire and Ice Shrine. |
Corridor of Fire and Ice Guide
| Objectives | |
|---|---|
| 1 | Equip the Fireproof Mantle and head down into the Bishui Golden-Eyed Beast boss fight. |
| 2 | After the boss has been defeated, a cutscene will play and you'll have cleared the secret area! |
| * | Once the cutscene is over, teleport back to the Corridor of Fire and Ice Shrine and head back down to the boss arena. There will be a newly opened area that contains an Awaken Wine Worm! |
Black Myth Wukong Chapter 3: White Snow, Ice Cold Guide
Black Myth: Wukong Walkthrough Table Lists
| 1 | Black Cloud Red Fire | 4 | Purple Cloud Mountain |
| 2 | 5 | Golden Child, Crimson Blood | |
| 3 | White Snow, Ice Cold Guide | 6 | Unfinished |
Snowhill Path Walkthrough
Frost-Clad Path Guide
| Objectives | |
|---|---|
| 1 | From the starting area, follow the path until you're out of the cave. |
| 2 | Activate the Frost-Clad Path Shrine. |
| 3 | Continue following the path up the mountain killing any enemies on the way. |
| 4 | Prepare yourself to fight the Macaque Chief before heading into the open area. |
| * | Rest back at the Shrine since the next Shrine you unlock is at the end of Snowhill Path. |
| 5 | Continue up the mountain until you reach the temple area. |
| 6 | Immediately head left and up the stairs. Also, dodge as soon as you get to the top of the stairs since there will be an enemy waiting to ambush you. |
| * | Explore the area for any treasure chests and items you can find. |
| 7 | Continue down and right towards the tree in the middle of an island. Don't go to the tree until you're ready to proceed to the next area. |
Mirrormere Guide
| Objectives | |
|---|---|
| 1 | After the cutscene, activate the Mirrormere Shrine. |
| * | Explore the area for a Meditation Spot, treasure chests, and any other items you can find. |
| 2 | Step on to the lake and fight Kang-Jin Loong. |
Pagoda Realm Walkthrough
This area has a gimmick with Lantern Waderns where they will cut your Max HP in half. Whenever your screen turns desaturated, either defeat a Lunar Warden or wait out the effect so you can heal yourself back to full.
Waiting out the effect is the preferred option, but defeating Lunar Wardens grant you a lot of EXP and Will for this area of the game.
Lower Pagoda Guide
| Objectives | |
|---|---|
| 1 | After the cutscene ends, you will be put in a new area. Follow the path outside your cell until you reach the Lower Pagoda Shrine. |
| * | Ignore any cells with a purple seal for now since you'll need to defeat a boss to unlock them. |
| 2 | Continue following the path until you see a staircase on the inside that will lead you to the second floor. |
| 3 | Head up and turn right once you're on the second floor. Follow the path across the wooden beam and head inside. |
| 4 | Continue following the path until you come across a ramp on the right that will lead you up to the third floor. |
| 5 | At the top, continue following the path forward until you come across the Upper Pagoda Shrine. Make sure to activate it, otherwise, you'll need to go all the way back up here if you die. |
| * | Turn around and drop down to the purple area to fight Captain-Lotus Vision. Defeating this boss will unlock all the purple sealed cells in the area. |
| ** | Return to the Lower Pagoda to unlock the cells that were previously sealed. The cell that's next to where you initially spawned will have an NPC that will start The Third Prince Questline. |
Upper Pagoda Guide
| Objectives | |
|---|---|
| 1 | From this Shrine, continue on forward until you need to drop down to the ledge on your right. |
| 2 | Continue on forward across the wooden beams until you reach an entrance with a lantern. |
| 3 | Go through the entrance and up the ramp leading to the fourth floor. |
| 4 | Continue following the path until you come across a ramp on the right that will lead you up to the third floor. |
| 5 | At the top, head out left and follow the path until you reach the broken structure that leads you to the top of the prison. |
| 6 | Once you're at the top, follow the path on the left until you reach the Mani Wheel Shrine. |
Mani Wheel Guide
| Objectives | |
|---|---|
| 1 | Rest and prepare yourself to fight Captain Wise-Voice. Defeating this boss will prevent any Lantern Wardens from spawning, so make sure to take on this boss only after you're done farming them. |
| 2 | After the boss has been defeated, head out the other side and activate the Outside the Wheel Shrine inside the cave. |
Outside the Wheel Guide
| Objectives | |
|---|---|
| 1 | Head forward through the cave picking up any items along the way. Make sure to get the Luojia Fragrant Vine for your Gourd upgrades. |
| 2 | Continue on forward outside the cave and pick up any items and treasure chests you find. |
| 3 | The path forward is extremely linear, so keep following the path until you reach the Snow-Veiled Trail Shrine. |
Snow-Veiled Trail Guide
| Objectives | |
|---|---|
| 1 | Head up the stairs to the left and follow the path filled with the Frozen Corpses. |
| * | Following the path to the right will lead you to The Great Pagoda, but you can't do anything there yet. It's still a good idea to visit the area though just to unlock the Shrine. |
| 2 | Once you reach the small creek, head left up the stairs until you reach the Warding Temple Shrine. |
The Great Pagoda Guide
As of Chapter 3, there's nothing you can do here. From what can be seen so far, each wall needs to be filled with a mural, and these murals are unlocked after beating a Chapter.
Based on this information, it can be assumed what you would need to beat each chapter before unlocking The Great Pagoda's secret. Most likely, this will unlock the Chapter 3 secret area since it isn't unlocked otherwise
Warding Temple Guide
| Objectives | |
|---|---|
| 1 | Continue up the stairs and into the temple, where you will need to fight the Macaque Chief for the second time. |
| * | Head back to the Shrine and rest since there will be another boss fight after leaving this area. |
| 2 | After beating the boss and unlocking the Ring of Fire spell, head to the left and out through the back exit. |
| 3 | Head up the slope and then slide down into the next area. |
Bitter Lake Walkthrough
North Shore of the Bitter Lake Guide
This is the area you slide down towards before boarding the Turtle Island and taking on Kang-Jin Star. As of now, it looks like there's nothing to do here besides unlocking the Shrine.
Turtle Island Guide
| Objectives | |
|---|---|
| * | You can die to Kang-Jin Star to respawn and activate the Turtle Island Shrine. |
| 1 | Once you're ready, head up towards the cymbals and defeat Kang-Jin Star. |
| * | Rest at the Shrine and head to the right to defeat Cyan Loong. |
| 2 | Head forward from the Shrine all the way to the Turtle General's head. |
| 2 | When you're ready to leave, talk to the Pig. |
South Shore of the Bitter Lake Guide
| Objectives | |
|---|---|
| * | Head to the left and defeat Chen Loong to start the Zodiac Village Questline. |
| 1 | From the Shrine, follow the frozen corpses to the right and into a cave. |
| 2 | Follow the path upwards until you reach a rope bridge. |
| * | Before the bridge, go through the opening in the left to grab a trasure chest. |
| 3 | Head across the bridge and unlock the Precept Corridor Shrine. |
Precept Corridor Guide
| Objectives | |
|---|---|
| 1 | Follow the path forward, picking up the Meditation Spot and treasure chest on the way. |
| 2 | Once you reach the cave, head left and follow the stairs upwards until you fight the Red-Haired Yaksha and absorb its Spirit. |
| 3 | Head out and into the pagoda to start a cutscene. |
| 4 | After the cutscene, head left and interact with the first Buddha statue. |
| 5 | Continue going left and down the stairs until you reach the second Buddha statue on the right. |
| 6 | Turn around and follow path past the stairs until you reach the third Buddha statue. |
| 7 | Go through the gate and continue on until you see the final Buddha statue with a Red-Haired Yaksha on the right. |
| 8 | Turn around and drop down back to the pagoda for another cutscene. |
| 9 | After the curscene, head right and follow the stairs all the way up towards the big statues. |
| 10 | Keep going forward past the first two big statues until you reach the third one. |
| 11 | Head up the stairs and go in through the small gap at the top. |
| 12 | Follow the path upwards until you reach the Mindfulness Cliff Shrine. |
Valley of Ecstasy Walkthrough
Mindfulness Cliff Guide
| Objectives | |
|---|---|
| 1 | Once you're ready, follow the path into the open area where you'll have to fight Non-White for the first time. |
| * | Head back to the Shrine and rest up before proceeding forward. |
| ** | You can drop down to the collapsed pillar by following the path downwards past the tree in the boss arena. Following this path will lead you to a Fiery Gourd and the Skandha of Thought. |
| 2 | Continue upwards past the cave entrance and head forwards until you fight Non-White for the final time. |
| 3 | After the fight, activate the Meditation Spot and proceed down the snowy slope and to the Forest of Felicity Shrine. |
Forest of Felicity Guide
| Objectives | |
|---|---|
| 1 | Follow the very long path forwards until you reach the Longevity Road Shrine. Just follow the obvious path laid out before you and you'll get there eventually. |
| * | You can choose to explore the Valley of Ecstasy since this is a large section with optional areas, quests, and bosses. Make sure to activate any Shrine you come across, so that you have locations to teleport to. |
Melon Field Guide
This is an optional area that's part of the Treasure Hunter Sidequest. We will update this section when we have more info regarding this quest, so stay tuned!
| Objectives | |
|---|---|
| 1 | To get to this area, head down from the path to the right of the Forest of Felicity Shrine. |
| 2 | Once you're down, turn around and take any of the bridges to the right side of the area so you can access the Brook of Bloss Shrine. |
This is an optional area that's not necessary to complete the main story. However, there are items and collectibles around this area, so it is still worth visiting.
Towers of Karma Guide
| Objectives | |
|---|---|
| 1 | To get to this area, you'll want to head head through the archway in front of the Forest of Felicity Shrine, and then head left. |
| 2 | From there turn right and follow the path forwards until you reach the Towers of Karma Shrine. |
This is another optional area that's not necessary to complete the main story. Again, there are items and collectibles around this area that makes it worth visiting.
Longevity Road Guide
| Objectives | |
|---|---|
| 1 | From the Shrine, head forwards to the open area and go right towards the New Thunderclap Temple. |
| 2 | Follow the path up to the entrance of the temple and defeat Captain Kalpa-Wave. |
| 3 | Once the boss is defeated, head through the entrance and activate the Temple Entrance Shrine. |
New Thunderclap Temple Walkthrough
Temple Entrance Guide
| Objectives | |
|---|---|
| 1 | From the Shrine, just head on straight throught the building in front of you and up the dual staircase.. |
| 2 | Once you're up the stairs, continue straight through the nearby building. |
| 3 | Continue going straight on forward until you reach the large open area with a big set of stairs and two massive Dark-faced Overlords. |
| 4 | Climb up the stairs and activate the Mahavira Hall shrine. |
Mahavira Hall Guide
| Objectives | |
|---|---|
| 1 | Prepare yourself since this is the final Shrine before you head to the final boss of this chapter. |
| 2 | Once you're ready, head through the doors to face the final boss of this chapter, Yellowbrow. |
| * | After beating his first phase, you will be sucked into his pouch where you'll fight a power up version of the Macaque Chief. Thankfully, you'll be fully recovered so the only thing you'll need to worry about are your spell and ability cooldowns. |
Floating Scuplture Guide
The Floating Scuplture Upper and Lower Level travel locations aren't Shrines but are teleport points that act as a failsafe in case you die during the Yellowbrow boss gauntlet.
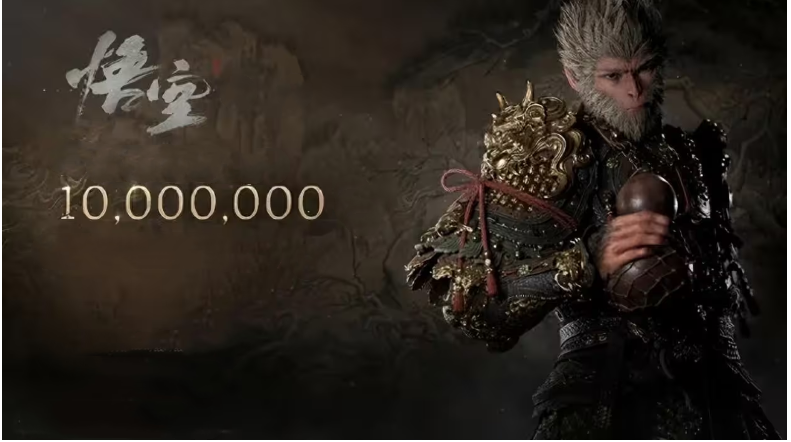
"Black Myth: Wukong" officially announced that its sales across all platforms have exceeded 10 million copies.
The development process and Outstanding sales performance of Black Myth: Wukong
The development process and milestone events of Black Myth: Wukong
2017: Black Myth: Wukong development started.
August 20, 2020: The first 13-minute gameplay demo video was officially released, which immediately became a hit on the Internet. The official Bilibili channel of "Black Myth: Wukong" exceeded 10 million views in less than 24 hours, and the topic reached a high popularity of 80 million on the hot search. This initial demonstration showcased the game's potential and attracted widespread attention and high praise from gamers, game art practitioners, and netizens.
2021: The second gameplay demo video was released as scheduled, showing significant progress in terms of plot, gameplay, and graphics compared to the first video.
March 30, 2021: Tencent completed its investment in the game developer Game Science, obtaining a 5% stake. This investment aimed to provide technical support for the development of "Black Myth: Wukong," considering that the game is based on the "Unreal" engine, and Tencent has experience and technical resources in this area.
August 20, 2024: The game was officially launched globally. It achieved remarkable success, setting a new record for the highest number of concurrent online players on the Steam platform in less than 24 hours, surpassing the records of previous popular games such as "Elden Ring" and "Cyberpunk 2077." The game also received high acclaim from the media and players, with its sales exceeding 4.5 million copies and sales revenue exceeding 1.5 billion yuan on the first day of release.
Black Myth: Wukong Outstanding Performances
On the first day of release, the total global sales exceeded 4.5 million copies. Among them, the sales on the Steam platform exceeded 3 million copies.
The peak number of concurrent online players on the Steam platform of this game exceeded 2.2 million, ranking second in history. The peak number of concurrent online players of "PUBG: Battlegrounds", which ranks first, is 3,257,200.
Enthusiastic response from players:
Stunning visual effects: European players generally highly praise the game's visual effects. Whether it's environmental design or the detailed presentation of characters and enemies, it reflects the deep artistic skills of the development team. Many players say that the game's graphics are a "visual feast". When running on next-generation consoles and high-end PCs, the expressiveness is astonishing. Its picture details and lighting effects are considered one of the best among the games they have played. For example, player Sreeko1 said, "This is the best sand scenery I have ever seen in video games. It's so detailed that it's even a bit excessive."
Unique cultural background: "Journey to the West" is already a super Chinese IP that is popular all over the world. The game is adapted from the experiences of Sun Wukong and successfully combines Chinese traditional culture with modern game design, giving overseas players a reasonable entry point for understanding the game's plot. The uniqueness of its cultural background is very attractive in the European market, especially for those players who are eager to explore different cultures. For example, Bachmann - Ho, a Chinese player who grew up in Berlin, said that "Black Myth: Wukong" allowed him to experience the classic story in a new way. He really likes the adaptation of the story in the game, which makes people feel both familiar and fresh.
Challenging game difficulty: Although the game is quite difficult, most players believe that this kind of challenge is exactly the charm of the game. Its combat rhythm is faster and more aggressive than most similar games. Players need to dodge attacks at the last moment and counterattack immediately. This high-risk, high-reward combat style has extremely high requirements for operation. However, although the game does not have a difficulty adjustment option, players can redistribute skill points at any time to adapt to different combat needs. This to a certain extent increases the flexibility and playability of the game. For example, player Lucas from Berlin said, "I like the challenge of the game. Each boss battle is like a tactical contest. The feeling of rethinking strategies after failure is very fulfilling."
Of course, some players also pointed out that there are some problems in the game, such as the lack of a map which makes it easy to get lost, some checkpoints are not in good positions, and players need to be familiar with "Journey to the West" for the plot. But in general, "Black Myth: Wukong" has received extensive attention and high recognition after its release and is an influential and excellent game work.

Black Myth Wukong Chapter 1: Black Cloud Red Fire Walkthrough Guide
Black Myth: Wukong Walkthrough Table Lists
| 1 | Black Cloud Red Fire | 4 | Purple Cloud Mountain |
| 2 | 5 | Golden Child, Crimson Blood | |
| 3 | White Snow, Ice Cold Guide | 6 | Unfinished |
A complete walkthrough for Black Myth: Wukong's Chapter 1: Black Cloud, Red Fire. Read on for a detailed guide for this chapter, including locations of collectibles, how to beat the bosses, as well as to unlock the secret area for completing this chapter!
Forest of Wolves Walkthrough
Prologue Guide
| Objectives | |
|---|---|
| 1 | You will start the game as Sun Wukong facing off against the Court of Heaven and its Heavenly Kings. |
| 2 | After the cutscene will be thrust into a boss fight with Erlang, don't worry as you cannot die in this fight so use this chance to practice the controls. |
| 3 | Once you defeat Erlang, another cutscene will play with Sun Wukong being incapacitated by his circlet. |
| 4 | After being turned into a rock, and another cutscene, you will now be able to play as the Destined One. |
| 5 | After tricking some Wolf Guais into thinking you're a Peach, go ahead and fight them. Use the chance to get used to the controls. |
| 6 | After the fight, head north up a path and there's another Wolf Scout. Defeat it and head up some stone steps you should end up with a fork on the road. |
| 7 | Head left from the path and fight the Wolf Scout guarding a chest with 5 coins. Head back and now go right where you will fight a Wolf Stalwart. Defeat it and you will be directed to a small shrine. |
| 8 | Interact with the shrine and a cutscene will play and the Keeper will ask you to head to Guanyin Temple. |
Front Hills Guide
| Objectives | |
|---|---|
| 1 | After doing what you need at the Shine and getting the Incense Trail Talisman, move forward and beat the wolves along the way. |
| 2 | Cross the bridge and keep moving forward. You will now be at an open area. To progress the story, follow the path. |
| * | You can jump down into the river and follow it upstream and there will be a Crow Diviner Yaoguai. Defeat it for a ton of experience and capture the nearby Wisps. |
| 3 | Going back to the forest hill path, make your way right and you will encounter the Bullguard. You can go back to a shrine to refill your health and gourd. ▶ Click here for Bullguard Boss Guide |
| 4 | Once you're ready, head towards the Bullguard to engage it in battle. Once you whittle it down to half its health, the Keeper will give you the Immobilize spell! Keep up the offense until you beat the boss! |
| 5 | Past the gate the Bullguard was guarding, there will be another fork in the road. Head right for some medicine ingredients and head left to progress the story. |
| 6 | Follow the path and you will end up to a Meditation Spot. Make sure to use it to get a free Skill Point. |
| 7 | Across the meditation spot, there will be a crevice on the wall. Head inside and make your way through, following the gold trail to the next Shrine. |
Outside the Forest Guide
| Objectives | |
|---|---|
| 1 | After doing what you need at the Shine, the Keeper will turn you into a Golden Cicada. Make use to of this to scout the area ahead, you can skip forward or head back for anything you may have passed through. |
| 2 | From the shrine, head forward beating up the wolves along the way until you see a fork at the road. |
| 3 | Head left first and you can beat up a few wolves and a chest. Near the stream, theres a Ginseng plant that's actually a monster. Be careful as this one can deal serious damage. |
| 4 | Follow the stream from the source and there is another Crow Diviner meditating. Head back to the bridge and there is an archer there. |
| 5 | From the bridge and archer head towards the shrine where you can find Guangzhi. Make sure you're prepared before you take on the boss! |
| 6 | Once you're ready, head towards Guangzhi to engage it in battle. ▶ Click here for Guangzhi Boss Guide |
| 7 | After beating Guangzhi, make sure to ring the nearby bell. After looting the area, head back to where the giant green monster is. |
| * | While you can battle the Wandering Wight, you can just run past it and head into the tunnel behind it. ▶ Click here for Wandering Wight Boss Guide |
| 8 | After beating or running past the Wandering Wight, keep following the path through the tunnel. Defeat the enemies along the way and you will end up at Guanyin Temple. |
Guanyin Temple Guide
| Objectives | |
|---|---|
| 1 | Head inside the temple and a small cutscene will play. Afterwards head towards the shrine and you are now able to craft new Armor! Make sure you have enough materials. |
| 2 | After getting your new drip at the Shine, you can look around and break stuff. Northwest of the shrine, there is a Chest so make sure to grab that too. |
| 3 | Once you're ready to face another boss, head up the steps where you will face off against Lingxuzi. ▶ Click here for Lingxuzi Boss Guide |
| 4 | After beating Lingxuzi, you can look around and loot stuff. Afterwards, head inside the temple where you will find the Celestial Jade Lotus Pill. |
| 5 | After grabbing the pills, you can keep moving forward and exit through the back. Follow the glittering trail to the Bamboo Grove! |
Bamboo Grove Walkthrough
Back Hills Guide
| Objectives | |
|---|---|
| 1 | After resting up at the Shrine, you will see a small valley with a few enemies. Before you go running forward, to your left there will be a small cave so make sure to hug the wall while going forward. |
| 2 | After finding the cave, you will find a Horse monster named Guai and a Meditation spot in the middle of the cave. Make sure to exhaust his dialogue options and use the Meditation spot at the middle. |
| 3 | Once you're done, keep following the path down and you can wander around the water for some Wills. If you want to progress, head up the stone stairs and you will see a bridge on top. |
| 4 | Cross the bridge and you will be greeted by another familiar trail of sparkles. There is a nearby gazebo with a gold box you can open. |
| 5 | After grabbing the contents follow the sparkle, follow the glittering trail to the Snake Trail! |
Snake Trail Guide
| Objectives | |
|---|---|
| 1 | Head towards the Shrine, you need to fight another Crow Diviner. Defeat it and you can rest up and swap some skills and equipment around. |
| 2 | After doing what you need at the Shine, head up the stairs. You will see a strange man reciting poetry, go talk to him to upgrade your Gourd. |
| * | If you defeated the Wandering Wight, head back to the Shrine so you can get its Spirit. You can also upgrade it with the Blood of the Iron Bull it dropped. |
| 3 | Once you're done, head back to where the old man is and you can proceed to crossing the bridge. |
| 4 | Keep threading forward and you will see a field of Bones. Past that, you can continue walking until another fork in the road appears. |
| 5 | After getting to the fork in the road, follow the stream instead of going under the bridge first. You can collect the green Will spirits along the way. |
| 6 | Keep following the stream and you will be put into a battle with Baw-Li-Guhh-Lang. ▶ Click here for Baw-Li-Guhh-Lang Boss Guide |
| 7 | After beating Baw-Li-Guhh-Lang, collect its spirit and Tadpole. Keep following the stream and you will be taken back to the main path. |
| 8 | You can head back to a Shine and heal up. Head back to the fork in the road and you can now head under the bridge. |
| 9 | After a bit of walking, you will end up at a bamboo forest. There is a Fungiling near a brasier if you pick up a Snake-Head Mushroom |
| 10 | If you want to progress, look around and you will see a small opening to the right lit up by torches. |
| 11 | Head inside the opening and you will be put into a battle with Guangmou. ▶ Click here for Guangmou Boss Guide |
| 12 | After beating Guangmou, make sure to ring the nearby bell. It is located up a stairway to the left of the path forward. |
| 13 | After ringing the bell, head through the small archway and follow the trail of gold to the next Shrine. |
Marsh of the White Mist Guide
| Objectives | |
|---|---|
| 1 | After resting up at the Shrine, across it, there is a tree with yellow flowers hanging from it. Grab the Luojia Fragrant Vine for something you will need soon. |
| 2 | Head down the path and you will see a Snake Patroller harassing another Monkey. Defeat the snake and you will gain access to the Monkey's Shop! |
| 3 | Follow the monkey to his shop and you can upgrade your Gourd and Soak to improve your healing! After that you can drop down below for a shortcut to the main path. |
| 4 | Exit the monkey's cave and cross the wooden platform to get to a building with a chest. |
| 5 | Keep following the path and make sure you're equipped since at the end of the path and you will be put into a battle with the Whiteclad Noble. ▶ Click here for Whiteclad Noble Boss Guide |
| 6 | After getting through the two phases of the boss, you can now go ahead to the left to a flooded ravine you can cross |
| 7 | Cross it and you need to fight wolves in order to ring the bell. Before you do so, you can interact with the hanging wolf to get a Fireproof Mantle. |
| 8 | Ring the bell and you will then be teleported to the The Ancient Guanyin Temple. |
| 9 | Head to the Temple and there will be a Shrine there. Once you're ready, head inside and after a cutscene you will be put into a battle with Elder Jinchi. ▶ Click here for Elder Jinchi Boss Guide |
| 8 | After the Ancient Guanyin Temple shenanigans, you can head inside the structure behind where the Whiteclad Noble was to get to the Black Wind Cave. |
Blackwind Cave Walkthrough
Cave Interior Guide
| Objectives | |
|---|---|
| 1 | Head inside the cave behind where the Whiteclad Noble was. There will be a Wolf Assassin once you reach a bright area so be careful. |
| 2 | Head further into the tunner and there will be the last Meditation Spot at the end and a Celestial Taiyi Pill. |
| 3 | Keep following the path and the Shrine will be guarded by two Wolf Sentinels. You can use the Shrine at your own discretion. |
| 4 | From the shrine, head forward and you will now be faced with the Black Wind King. ▶ Click here for Black Wind King Boss Guide |
| 5 | After beating the Black Wind King, you will receive the Cloud Step Spell. Loot the area while you're there and proceed once you're ready. |
Outside the Cave Guide
| Objectives | |
|---|---|
| 1 | Head to the Shrine and you can now proceed to the top of the mountain. |
| 2 | While heading up, there is a small area you can drop down from where there's a chest guarded by a Wolf Assassin. |
| 3 | Keep heading up while beating the Bullguards along the way and make sure to grab the Celestial Nonary Pill while you're going up. |
| 4 | The rest of the way up, will just be a bunch of Wolves so take them out and you will soon arrive at the final Shrine. |
Bodhi Peak Guide
| Objectives | |
|---|---|
| 1 | Head to the Shrine and make sure you're prepared for the final boss. |
| 2 | Once you're ready, you need to face off the final Boss, Black Bear Guai. ▶ Click here for Black Bear Guai Boss Guide |
| 3 | After beating Black Bear Guai, you will get your first Relic and that concludes the first Chapter! |
Ancient Guanyin Temple Walkthrough
Grand Chamber
| Objectives | |
|---|---|
| 1 | After ringing the bell, you will be teleported to the Ancient Guanyin Temple. |
| 2 | Head to the Temple and there will be a Shrine there. Once you're ready, head inside and after a cutscene you will be put into a battle with Elder Jinchi. ▶ Click here for Elder Jinchi Boss Guide |